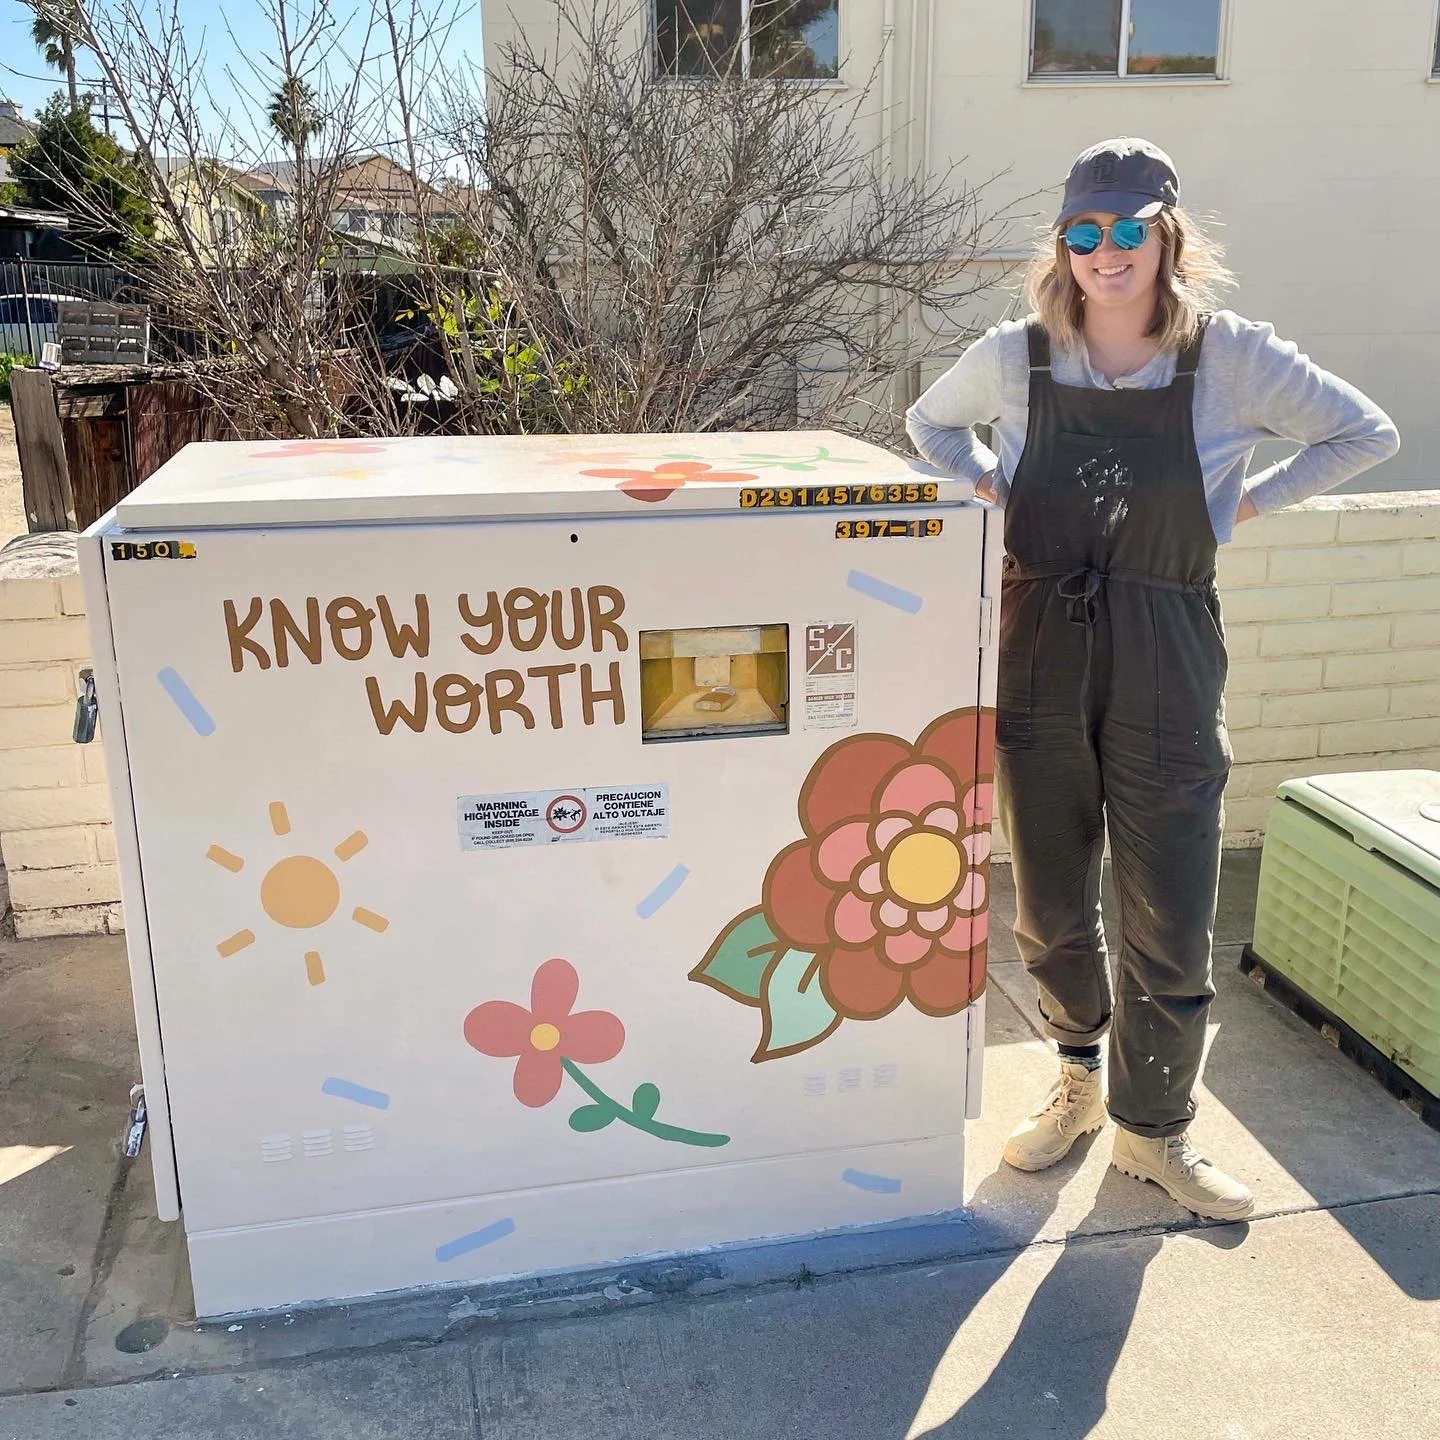
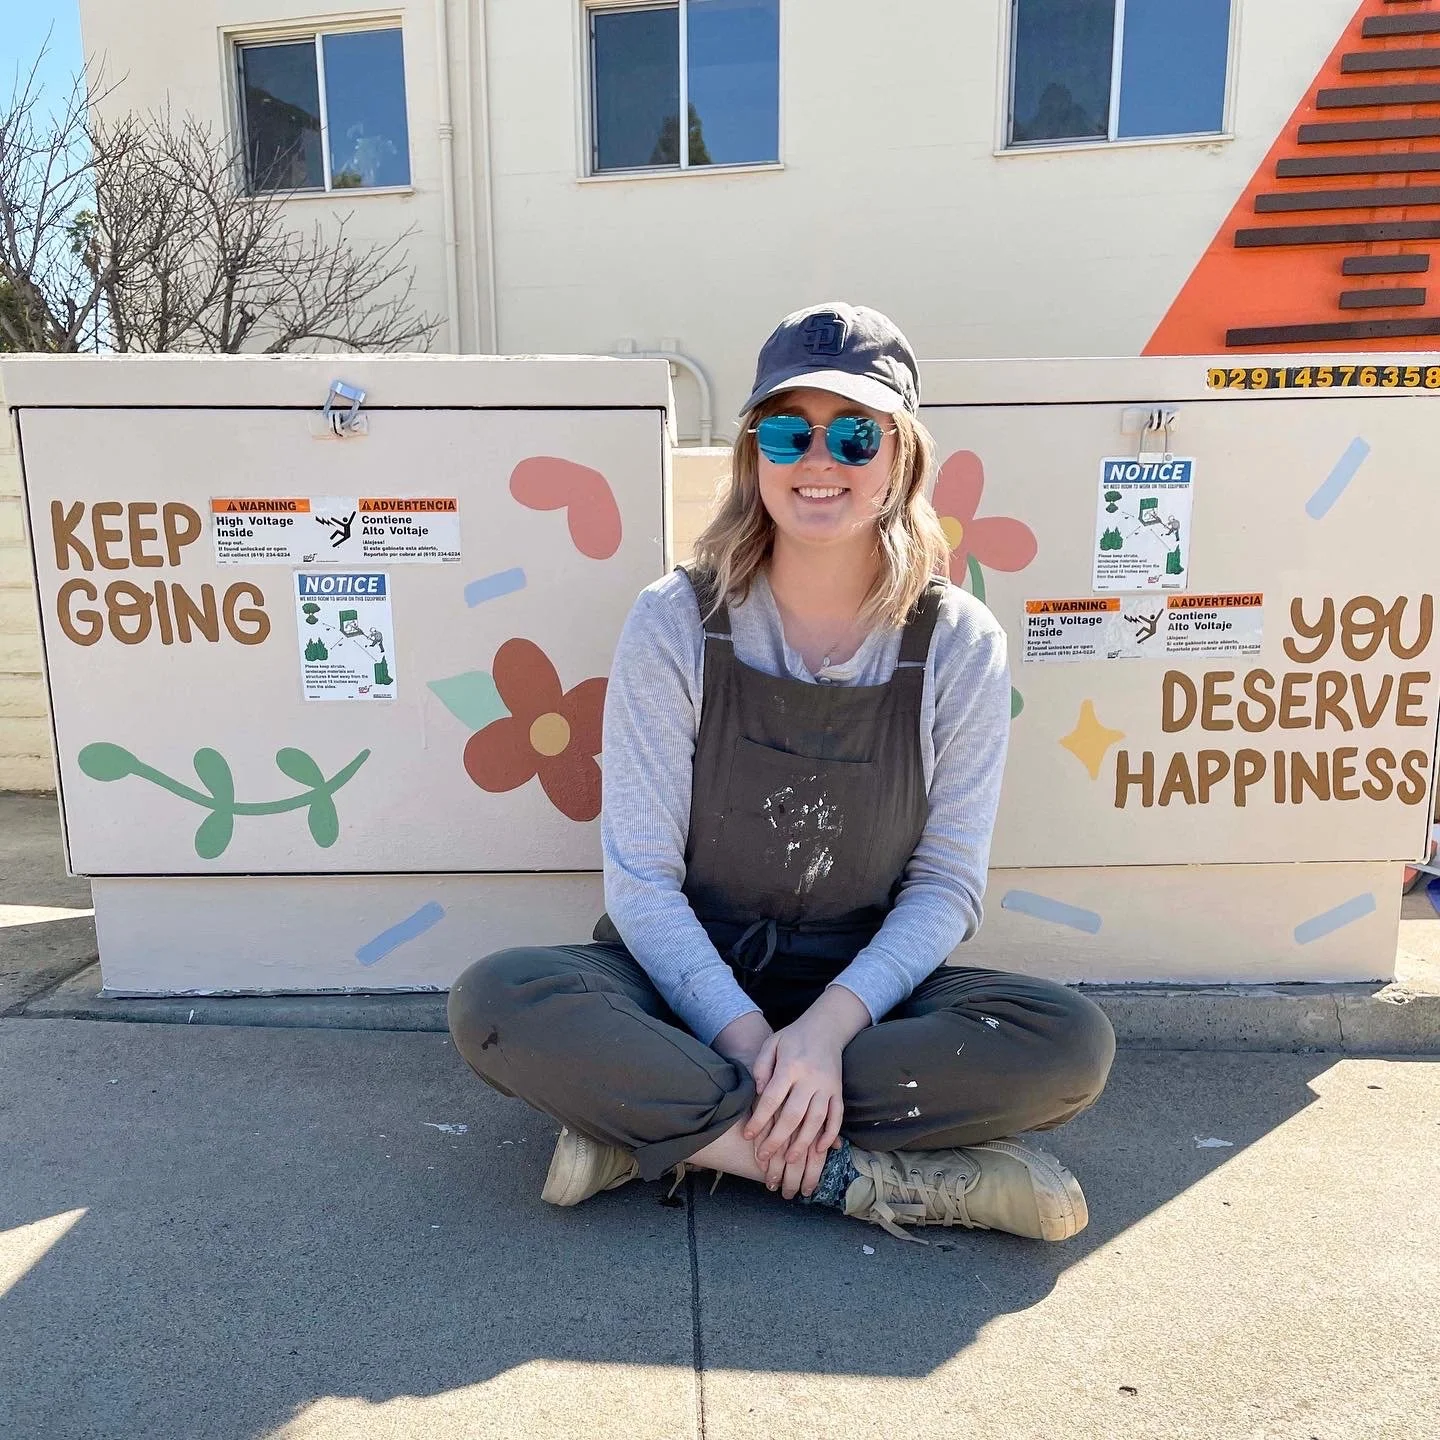
Painting a Utility Box in La Mesa, California
Please note that you cannot just go up to a utility box and paint it, that would be vandalism. You have to apply and be approved, and after approval, you will be assigned a location. It’s free to apply and anyone can do it! To see if there are programs in your area, try Googling your city name + “utility box program”, or check out my blog post How to Paint a Utility Boxin . At the end of this blog, I’ll also have an updated supply and dos & don'ts list.
About a year after painting my first utility box, I got the itch to do it again. In the year since, I’d been able to help paint murals with a non-profit called ArtReach, and began wanting to paint something of my own. So to Google, I went. Since I’d already painted a box in Vista, I expanded my search. I’m from North County San Diego, so I searched for utility box programs up in Los Angeles all the way down to Little Italy, SD. I wound up finding one in La Mesa, which was about an hour from my house and seemed like a distance that I could handle. So like before, I downloaded the online application, sketched out my design, and sent an email to the address provided. This time along with my application I also included photos from my first utility box project, so they could see my work in action.
Digital mockup I included of my design.
About a week later, I received an email back from Misty who asked if I’d like to paint not one, but three utility boxes. She included a photo of all three boxes in her reply and said that since they are all next to each other, she thought they would look nice painted in a similar design. I was flattered at the suggestion and replied yes right away! After that, we exchanged a few more emails and arranged a date for me to come by her office to both look through their inventory of donated supplies and also to go to the paint store with her so she could purchase my paint. Unlike the last utility box project I did which gave me a $100 stipend, this one offered to buy my supplies in person. Overall the contribution was about the same and I still ended up buying some extra supplies myself.
Here’s a very low-quality photo of the three boxes Misty wanted me to paint.
At this point in time, we are dealing with a house paint shortage, because of course we are, so the Sherman Williams store we went into looked like a barren wasteland. I picked up the only four quarts of exterior house paint they had left and quickly had to choose colors that resembled my digital mockup. After parting with Misty, I decided to stop by the actual location of the boxes so that I could measure them because I wanted to make a new digital mockup. So once home, I drew up three new boxes and pieced my original design together like a puzzle to fill up all the new space. I then printed out the new mockups so that I could use them as a reference on painting day.
Reference swatches I picked up from Sherman Williams
I printed out a page like this, and then three others with one box on each.
The design for this box was inspired by an illustration I’d drawn about a year prior. The illustration included the phrase “Know Your Worth” and I wanted it to be a reminder for people to value themselves. For this utility box painting, I decided to add the phrases “keep going” and “you deserve happiness”. I wanted the sayings to be short so that people driving by would be able to understand the message.
I made the original illustration into an acrylic pin and sticker!
Because this utility box was about an hour from my home, and we were painting three, I decided to plan for two days to get the project done. So the day before, I went to Home Depot and picked up some extra supplies. I got some plastic quart containers to mix some paint in, stir sticks, and extra foam rollers. After I came back home, I mixed the colors I still needed and painted sample swatches onto a small piece of canvas. I always like to test my colors before painting especially because I’m usually mixing shades myself and it’s important to me that the tones match up. While waiting for the paint to dry, I packed up all my materials and set them aside. Also please note that paint spills can happen to anyone! I highly recommend putting your paint cans into a large tub before putting it into your car. So if your paint spills, it stays contained and not over your vehicle! I’ve seen it happen!!
Color swatches
Anyways, the last thing I did the night before was go to bed early because I wanted to leave my house no later than 7:30 am. Saturday morning we were out of the house on time and at the utility boxes by 8. The first thing we did was assess how dirty they were, which was very. I’m talking dead spiders and stuck on goo that who knows where it came from or how long it’s been there. So if you’re able to have extra hands help you during the cleaning and priming process, I would use it! This step takes the longest in my opinion and it’s also not super fun. We used mineral spirits and another metal cleaner, along with rags, wire brushes, and metal scrapers to clean them. I recommend wearing gloves during this cleaning stage (and also if you’re using sealant at the end). For two of us tackling three boxes, it took between 2-3 hours for just cleaning and priming.
The primer I used for this one was donated by the city of La Mesa, and it was actually water-based, which is something I’d read not to use in my initial research. Before painting my first utility box, I remember reading that latex or oil-based primer was preferred for metal objects. However, the water-based primer dried sooo much faster and I had no issues with it! The great thing about painting three boxes is once I was done priming the third, the first one was pretty much dry and ready to be painted over.
I only had one quart of the tan paint for the base color, and we used every last drop to cover all three. Honestly, there were spots where I wanted to paint a second coat, because it was a little splotchy, but we didn’t have any paint left and I knew that it wouldn’t be noticeable once all the other elements were painted on top. That’s called going with the flow babyyyy.
From there I took my paper reference and used that to chalk out my design on the boxes. I started with the larger, outlined flowers and then sketched out where the smaller flowers and suns fit in. Starting off with the darkest red shade, I went around and painted all the petals according to my mockup. With my next shade, I placed little dots on all the petals I needed to paint first. This helped speed up my process so I didn’t have to keep checking the paper reference all the time.
That’s as far as I made it on day one! We painted for about seven and a half hours and then packed up the car to go home. I wasn’t looking forward to leaving my box unattended overnight and crossed my fingers that no on would mess with it. Luckily all we saw the next morning were a few chalk smears! I can hardly blame people for not being able to control their urge to mess that up.
Sunday morning we got to the box at 8am and I began painting right away! I started with the lightest pink shade, which would complete the flowers on all three boxes. Next I went in with yellow to fill in the center of the flowers and the suns. To paint the suns I started by making the center circle and then spaced out the rays so that each had six.
After yellow, I moved on to the darker of the two green shades to paint the leaves behind flowers and also leaf elements that stood alone. I painted a light green shade of leaves on the rest in hopes of adding some dimension. It was about 11 am at this point and that’s when my family decided to visit! My parents, along with my aunt, uncle, and dog nephew all stopped by to see my painting in action and to say hi. I knew I still had work to get done so after some quick chit-chat, I got back to it. I turned my back for one second and when I turned around, Barley was on top of my box! I don’t know how he got up there (it was my uncle) but it did make for a good laugh and some cute photos.
Barley getting his cute, dirty paws on my freshly painted utility box.
Once my family left, I started to sketch out the words for each box. I used a ruler and some chalk to draw out each phrase and then went in with a dark brown color using a smaller, flat brush. Painting the words took about two hours since I had to do two coats. I used the same brush width and color to outline a few of the main flowers. For this design, I wanted to have some elements outlined and leave the others alone.
The last words I wrote were my social handle on the bottom and then I went around all the three boxes and filled in empty spots with light blue sprinkles. At this point, I was exhausted but felt satisfied that the paintings were complete! The city of La Mesa requested that I cover the final mural in an anti-graffiti coating, so we had to wait for all of the paint to dry before adding that.
It was slightly windy while we were applying the anti-graffiti coating so unfortunately some dirt did get stuck to the box while we were finishing up, but I tried not to notice it too much because it was a little too late. While I don’t think adding this coating is necessary, it does mean that your painting will stay preserved and protected from any cleaner used to wipe off graffiti. I would probably use it on larger outdoor murals, but again, not necessary.
And then we were done! I immediately started taking some photos and videos while my painting assistant packed up and then took some more once he was done. Painting these three boxes was a lot of work, and I think it really paid off! These boxes feel like they belong in their environment and now have a new life spreading positivity.
Unlike my last box, this street we painted on was slightly quieter. I got a few people sharing their like of the design as they walked by and one person even stopped their car to ask for my business card. I ran across the street, paintbrush in hand, to give it to them! That’s the thing to remember about utility boxes, since they don’t offer you money (or much of it), it’s important to think of these projects as a way to add to your community and advertise your business. I can now use this experience to add to my portfolio and show people what my artwork looks like on a larger scale.
All together I would say this project took me 15 hours, and that’s actually not including the time it took to drive to and from the location. As with most mural projects, I was exhausted when I got home! My after-mural routine consists of taking a hot shower, eating a veggie sandwich, and laying down. It’s important to remember that muraling is hard, physical work and it can take a toll on your body. My lower back and shoulders are usually the sorest after bending over and reaching to paint certain areas.
A few weeks after finishing the box, I drove back down to return the leftover supplies I had. I met up with Misty again and she surprised me with a restaurant gift card as a thank you! She said she’d already had a few people comment on their like of the box and she was pleased with what I’d done. I agreed with her on the positive reaction I’d seen from the community and am also very pleased with this project! Before driving back home, I stopped by the boxes and got to take an updated picture when them. I can now give myself another year until I have the urge to do this again! :)
She was a little dusty, but overall looked great!
Until next time, Becca
P.S. Are you in the La Mesa area and want to check out these boxes in person? They are located right outside of La Mesa Lumber, a quick search in Google Maps should take you right there!
P.P.S. This was the second utility box I painted in La Mesa, California. If you’d like an in-depth read about the process of painting my first utility box in 2020, please click here. Or if you’d like a concise 10-step list for How to Paint a Utility Box, click here.


